- Get link
- Other Apps
How to make a portable basketball goal permanent - The artwork of embroidery began 1000's of years in the past. Early examples might be discovered everywhere in the world. There may be historic embroidery from Egypt, Northern Europe and China. Where and the way it actually began will stay a thriller. What we do know is that in Europe, embroidery was a standing symbol. The use of a needle and thread with a purpose to sew patterns on material was an indication of wealth and prosperity. It was thought of a woman's work. Many royal and noble ladies spent hours embroidering. They embroidered every thing, from tapestries to coats. These rich and highly effective girls had been typically depicted in portraits with their embroidery frame or different instruments used for the craft. Many different cultures share Europe's use of embroidery as marking wealth and prestige. Persia, India, Japan and China also have richly embroidered fabrics. These had been celebrated material and those who made them have been artisans of high caliber.
There are two main methods to avoid wasting a stabilizer. The first is through pre-planning, hooping your stabilizer slightly otherwise than typical, and the second is utilizing leftover scraps of stabilizer after it has been used for embroidery. How you narrow and hoop your stabilizer can prolong the number of embroideries you possibly can sew out, saving you money. When chopping your authentic piece of either cut away or tear away to place in your hoop, lower it the scale you want in a single dimension, both size or width, but much longer within the other dimension. As an example, in case you are chopping an 8-inch large piece for a 4x4 hoop, you might reduce the stabilizer 8" x 24". Embroider the first design at one finish. After neatly reducing or tearing the stabilizer away from the finished design, re-hoop on the similar finish for your next design, starting simply past the torn section. You might must press the stabilizer using a dry iron on low temperature in between hoopings if it is wrinkled. Now you'll be able to reuse more of the stabilizer, presumably having the ability to stitch out four (4) embroideries, depending on their measurement, from the one piece, instead of the three (3) embroideries you'll get by reducing three pieces 8"x8". Take this concept to the acute, and don't minimize your size off at all. Hoop your stabilizer, leaving the roll connected towards the highest of the ring. Place the roll behind the machine, out of the way in which of the ring, embroidery arm, or any threads. After the embroidery is full, tear the stabilizer away, press the wrinkles out, and hoop again at the forefront.
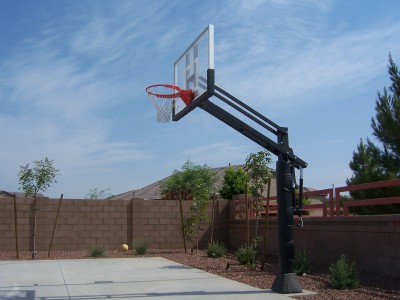
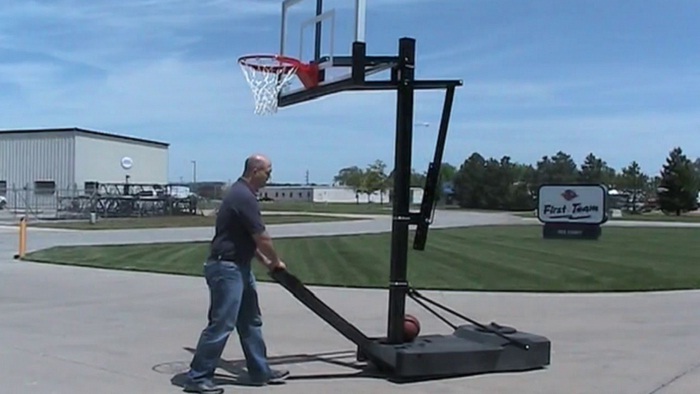
A portable basketball goal allows you to set up a hoop for a game with family and friends while at the same time not permanently secure a pole and backboard at the end of your driveway. Use anchors and ratchet strap the best option This is probably the best thing you can do to anchor down portable basketball hoop.

How To Convert Portable Basketball Hoops To Inground Portable Basketball Hoop Outdoor Basketball Court Indoor Basketball Hoop
This will make it lighter and easier to cut and move.
How to make a portable basketball goal permanent. Get Your Favorite Teams Gear Here. Ad Hey NBA Fans. Let Everyone Know Where Your Allegiance Lies.
Let Everyone Know Where Your Allegiance Lies. The Lifetime 44 Portable Poolside Basketball Hoop is designed with a 27 gallon roller base which you fill with water to provide the necessary stability. Ad Hey NBA Fans.
Place the tip of a spiral ground anchor on the soft ground one to two inches behind the. All that should be left. Insert the pole and allow the cement to dry and set completely before installing the backboard hoop and net.
Dont Miss Out On Official Gear From The NBA Store. Then you thread through the strap attach it to one end and tighten it up as you mean it. You basically take two anchors and hammer them down on two opposite sides of a portable hoop.
Man I loved Virgina Beach but like almost everywhere else it was a lot nicer in the 50s. Now you can play basketball with the same intensity as the pros. Dont Miss Out On Official Gear From The NBA Store.
The only parts you would use from the portable system would be the rim and backboard. Lay the portable basketball hoop on the ground in order to dismantle the rim and backboard from the pole. Use an extension arm to attach the basket and backboard.
This would require purchasing an in-ground pole system. To safely place the basketball goal in a particular spot make sure the ground is flat. Once PROBASE is installed simply remove the plastic base from your portable basketball hoop and insert the pole in the PROBASE system.
Unscrew the backboard and rim from the upright pole using a screwdriver. Get Your Favorite Teams Gear Here. Materials Best Deals Available.
Portable basketball goals allow you to easily move the court location to. Choose durability security and peace of mind replace plastic with steel Use PROBASE to upgrade your equipment to a professional level. While the base of the goal should be.
That will provide up to 30 inches between the playing surface and poleand allows you to adjust the hoop height to accommodate shorter players. This is because in-ground systems and portable systems use different pole kits. Some portables can be converted to an in-ground system depending on the mounting of the backboard.
Set the portable basketball hoop in its final position with the back of the base sitting on soft ground. Other times their driveways might have frequent traffic which would require flexibility where they set up their basketball court. Its been mentioned before you could try the SEARCH function and search basketball or perhaps backboard.
Maybe someone whos done the same can add to this. Sometimes customer might want to bring the system in for part of the year.

Convert A Portable Basketball Hoop To An In Ground Goal Sportarly

Hidden Costs Of Portable Basketball Hoops

How To Replace Basketball Backboard 16 Step Diy Guide Basketball Backboard Diy Basketball Hoop Basketball Hoop Diy
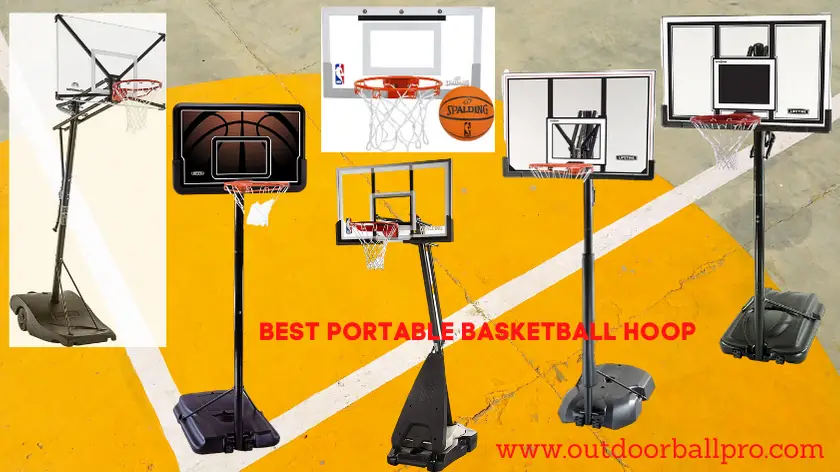
Best Portable Basketball Hoop 2021 Reviews Outdoor Goals

How To Keep Basketball Hoop From Falling Over Master The Yard
How To Secure Your Mobile Basketball Court Backyard Sports

Amazon Com Spalding Nba 50 Acrylic Exactaheight Portable Basketball Hoop Everything Else

Lifetime Basketball Systems Introduction Youtube

Hoop Anchor Portable Basketball Anchor System Portable Basketball Hoop Basketball Hoop Diy Diy Basketball Hoop

In Ground Basketball Hoop Installation Basketball Is Without Doubt One Of The Most Loved Game In Basketball Hoop Basketball Backboard Outdoor Basketball Court

How To Change Portable Basketball Hoop To Inground Konbit Shelter
In Ground Vs Portable Basketball Hoops Everything You Should Know

Basketball Projaw A Sturdy Steel Base For Portable Basketball Hoops Diy Basketball Diy Basketball Hoop Portable Basketball Hoop
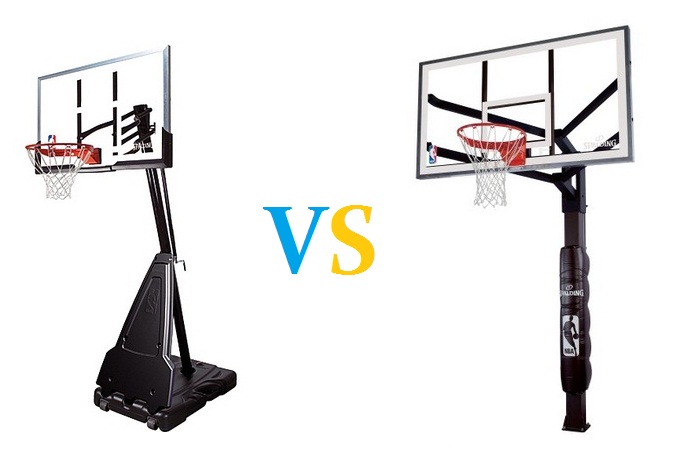
In Ground Vs Portable Basketball Hoop Which One Is Suitable For Me
I might like to provide you some ideas for hooping satin jackets for machine embroidery. We don't want topping for satin jackets because it's a steady material, unlike sport shirts and t-shirts which are knits and stretchy. Hooping satin jackets is one of the trickiest little jobs for the brand new embroiderer to grasp. The design placement on the jacket back should be excellent - not too low or excessive - and it should be straight. For placement, one rule of thumb is to position the bottom of the lettering (if utilizing an arc, measure for the letter at the high of the arc) seven inches down from the collar seam. One other is to place the design's middle at roughly 9 or 10 inches down from the collar seam. (That is just a guideline. If it's good to, get a sewout of the design or photocopy the actual size and lay it on the jacket to determine the most effective placement.) To get the design straight, lay the jacket flat and easy, and using clothespins, connect a yardstick underneath every sleeve where the seams come together. Draw a line with tailor's chalk or soap for the horizontal placement. Make a midway mark on this line to indicate the center. You should definitely double-check these measurements with your eye - jacket making will not be an exact science and sometimes you must regulate one way or another to make up for discrepancies in measurements.
Janome designed the Reminiscence Craft 9700 to carry collectively all one of the best features into one stitching machine. The MC9700 has the power and precision of a superior stitch mechanism mixed with the sophistication of computerized control. You get the precision stitching Janome is known for along with easy navigation and design structure on a colour contact display screen. The Memory craft 9700 can convert from a stitching machine into an embroidery machine in seconds. Unlike different brands that require separate attachments and numerous steps the 9700 has a built-in, two-step conversion. Just contact the embroidery mode key then connect the embroidery foot and one minute it is a stitching and quilting machine the next an embroidery machine.
Deanne Blackhurst is a contract writer for Dee's Pink Works, a web based website that makes a speciality of Redwork and Cross Sew patterns. Using the standard redwork fashion as inspiration, these new patterns are moderately priced and have a enjoyable vintage really feel but with a contemporary perspective. At Dee's Pink Works yow will discover basic units that function the Days of the Week and charming Sun Bonnet Ladies in addition to the extra current Cheese and Wine collection and Celtic Knots. Additionally they carry thread and notions particularly designed for redwork and cross sew. Visit them at Dee's Pink Work Inc [http://www.dsredwork.com] and find a sample you'll be able to't resist.
Comments
Post a Comment